Ahh! The joys of blogging! October 16th was World Bread Day (I didn't know there was such a day till I became a regular on Facebook). One of the groups I'm a member of had invited people to bake bread, any bread.
I almost gave it a miss because of my crazy schedule but then decided that since I like bread so much, I should at least try to get one done.
But what? So many had baked focaccia, some had baked pull apart rolls, many had done twisted loaves. Flipping through books and the Internet didn't help, not when you're under a bit of pressure and the 1 hour scheduled power cut at 3 pm was drawing nearer...
Oh! Got it! There was a nice picture of a loaf that had herbs and parmesan cheese. OK! Quick, measure the flour, the yeast... wait a minute, wait a minute! Why follow the same recipe?
And so this recipe was born. I was intrigued by the parmesan cheese. What would the loaf taste like? Umami? Or would the rosemary mask that taste? How much could I use to allow the flavour of both cheese and herbs come through?
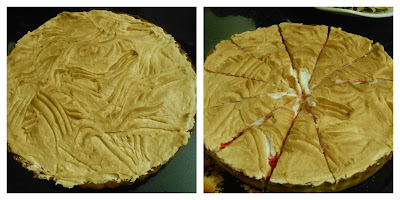
In the meantime, the cake was ready to go into the oven. Yes, in the middle of all this, I had to bake a cake. I was aiming to finish baking the cake and then popping the bread into the oven and have it all be done by 3 pm. Alas, that was not to be.
The flour was weighed out, along with all the other dry ingredients. Herbs were chopped, cheese grated, the processor made short work of kneading and then the dough was ensconced in a glass bowl for proofing. The cake was still baking and half an hour before the dreaded power cut, I decided that there was no point in shaping the loaf and leaving it to proof for more than an hour.
The dough was through with the first rising so I pushed out all the air and bunged both dough and bowl in the fridge.
Half an hour before the end of the power cut, I brought out the bowl. The dough has risen beautifully but from past experience, I knew that the bread wouldn't necessarily look pretty.
I shaped the dough into 2 loaves. Scored the tops and by then, the power was back. Just my luck- the voltage was low and by the time the thermostat climbed to the required temperature, the dough had over proofed.
But the loaf tasted really nice. Freshly baked, the flavour of the herbs shone through. Could have done with a little more thyme. But a couple of hours later, the herbs had toned down and the umami flavour was beginning to wake up. With little nips from the pepper. Ooh, nice.
Pepper, parmesan and herb loaf
Ingredients
500 gm flour
1 tsp gluten
1 tsp bread improver
1 1/2 teaspoons salt
2 teaspoons instant yeast
2 tablespoons sugar
40 gm soft butter
1/2 teaspoon freshly ground pepper
4 gm fresh rosemary, finely chopped
1 tablespoon fresh thyme, chopped
85 gm grated parmesan cheese
225 gm warm water
Method
Sift flour, gluten, improver (both optional) and salt together onto a worktop.
Mix through the yeast and sugar.
Make a well in the centre, pour in most of the water and combine into a dough.
Mix in butter, pepper, herbs and the cheese.
Knead well till the dough is soft, smooth and springy. Add more water if necessary to get to this consistency.
(In case you are using a bread maker or a processor, follow the instructions till you reach this step.)
Place dough in a big greased bowl, cover the top with clingfilm and leave to rise for about 45 minutes to 1 hour or till the dough has doubled in size.
Remove the clingfilm, punch down the dough to release the trapped air.
Place the dough on a lightly floured worktop, knead lightly for about half a minute.
Divide dough into 2, dust a little more flour on the worktop and roll each dough into a 10" log.
Place on a baking tray. Score the tops lightly and leave to prove for about 20 minutes or till doubled.
Spray a little water over the loaves, sprinkle a little flour over the tops and bake at 200
°C for about 20 minutes or till the loaves have baked to a golden colour.
Take the loaves out of the oven.
With mittened hands, turn them over and tap the base. It should sound hollow, indicating they are done.


