At the grill

7 comments


Grilled foods and barbeques are quintessential party food. Three or four different marinades, a few kinds of meat and vegetables, an efficient grill and you're good to go.

In an oven, the marinated food is placed on a grid with a drip pan underneath and the whole thing is placed under a hot grill. Ridged grill pans and frying pans are also excellent for grilling meat and vegetables on a stovetop.

Once the meats are marinated, most of the work is done. Grilled food is healthy so long as a minimal amount of oil is used. Also take care that the food does not char too much.

The following pictures were taken at a recently conducted grill workshop.

Lamburgers

Sweet chilli prawns

Moroccan chicken

Barbequed chicken

Teriyaki chicken skewers

Grilled chicken with yoghurt and lime

Rosti as an accompaniment

And a big bowl of salad


Gorgonzola and cherry tomato focaccia

6 comments


A focaccia is a flatbread, quite similar to a pizza and then again, quite different from one. The usual focaccia I make has a topping of Parmesan cheese, crushed rosemary and garlic. It makes a wonderful sandwich when sliced horizontally, layered with slices of tomato and roast chicken.

This focaccia recipe is a little different, both in terms of the topping and the thickness. It is a little less than an inch thick and topped with onion slices, garlic, olives, herbs, cherry tomatoes and Gorgonzola cheese. And, of course, olive oil.

It tastes simply delicious, the cheese adding a savoury note and the slightly tart cherry tomatoes providing a perfect foil to the olive oil infused bread.

Do follow this step by step instruction. I used a bread machine to knead the dough, it's a breeze without one either. Please follow your bread maker manufacturer's instructions about the order in which ingredients have to be added.

Gather your ingredients:

Clockwise from top left: water, extra virgin olive oil, flour, slices of onion and garlic, yeast, salt, sugar, black olive slices, Gorgonzola cheese. dried thyme and dried rosemary

And cherry tomatoes

Pour water and olive oil in the pan of the bread maker


Add in sugar and salt


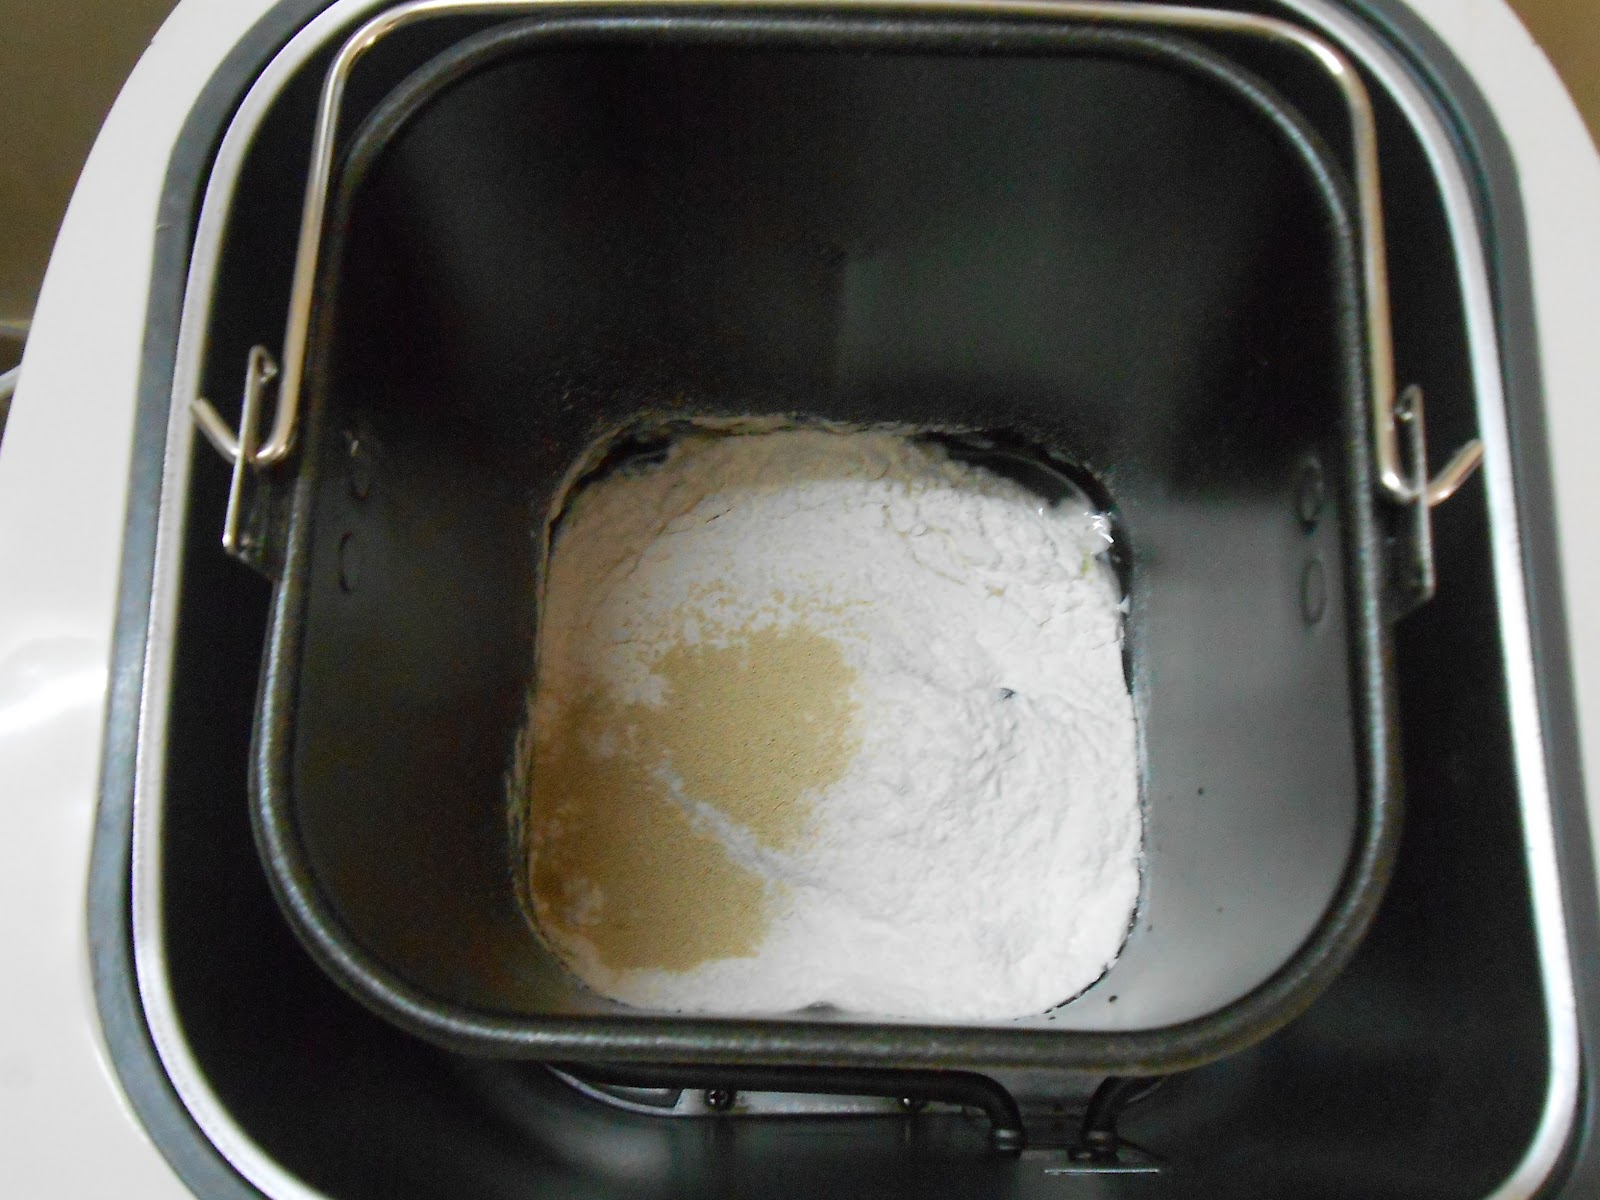
Sprinkle the flour over


Add the yeast. Close the lid, set the dough cycle and switch on


This is how the dough looks about 5 minutes into the mixing process


At the end of the mixing cycle. 


In the warmth of the bread maker, it takes 40 minutes for the dough to double in size


Take the dough out of the pan, punch it down to expel all the air bubbles. Shape the dough into a ball and place it on a floured worktop


Press the dough out with your fingertips into a flat disc


Use a rolling pin to roll it into a rough 9"x13" rectangle


Place in the baking tin and gently stretch corners to fit


Leave to prove for 15 minutes, then make indentations all over with the tip of the finger


Break Gorgonzola cheese into small pieces


Now the toppings go on. First, slices of onion, garlic and black olives,


followed by the cheese, rosemary and thyme.


Cherry tomatoes add a splash of colour. Pour over the olive oil and bake in a hot oven


20 minutes later, sizzling and golden focaccia


Transfer onto a wire rack to cool a little

Slice your golden, warm and delicious focaccia with a really sharp knife.

Gorgonzola and tomato focaccia

Ingredients
220 gm flour
1/2 tsp salt
1/2 tsp sugar
1 tsp instant yeast
1 tbsp olive oil
150 ml water

Topping
1 onion, sliced
6 cloves garlic, sliced
125 gm Gorgonzola cheese
3 tbsp black olive slices
12 cherry tomatoes, halved
1 tsp thyme
1 tsp rosemary
1/4 cup olive oil

Method
If using a bread maker, put the ingredients in as listed.
If you're kneading by hand, sift flour onto a worktop, mix in salt and sugar.
Make a well, pour in lukewarm water, olive oil and sprinkle yeast over the top.
Combine till a rough dough is formed, the dough should be a little sticky.
Knead using the base of your palm. Stretch the dough, roll it back, do a quarter turn and stretch it out again.
As you work the dough, it will tighten up and become soft and springy.
Knead for about 10 minutes, then place in a greased bowl, cover with cling wrap and leave in a warm place till it doubles in size. This may take about 40-60 minutes.
Punch down the dough to expel all the air bubbles, place it on a flour dusted worktop and cover with the bowl for about 10 minutes.
Press the dough with fingertips into a disc, then use a rolling pin to roll it out into a 9"x 13" rectangle.
Grease a baking pan of the same dimension, fit the dough into it and gently pull to fit the corners.
Leave to rise for 15 minutes, then make indentations on the dough with the tip of a finger.
Scatter onion and garlic slices, then the olive slices, followed by the herbs and cheese.
Scatter cherry tomato halves over, drizzle olive oil over it all.
Leave to prove for another 20 minutes, then bake at 200°C for about 20 minutes or till golden.
Remove from the oven, leave to cool for about 10 minutes.
Transfer to a wire rack.
Slice and serve hot.

Marshmallow chocolate brownies

2 comments


A couple of posts ago, there was a recipe for a hazelnut marshmallow fudge cake. The cake was demolished in a day and I was left with half a pack of mini marshmallows staring at me every time I opened  my store cupboard. I know from past experience that if you leave a pack of marshmallows around in a cupboard, they will harden and then you will have to throw them away. They are not fit for man, woman or bake.

Flipping through pictures of bakes with marshmallows did not help. Plenty of recipes for s'mores, grasshopper pies (no creme de menthe), cakes and more cakes. And then a picture of marshmallows baked in a brownie. That looked interesting but the recipe seemed complicated. So with light bulbs going off in my head, I found my simplest brownie recipe and decided to experiment.


The recipe was an easy one, no need to use heavy duty equipment aka the Kitchenaid. No need for an electric mixer. Just a wire whisk and hand power.

Oh, this was getting better. The butter did not have to be brought to room temperature, so it was warmed over a water bath along with the chocolate. The flour was weighed along with the cocoa, sugar and eggs whipped along with the flavouring. The batter was dense, dark and chocolatty. Once the batter was ready, the marshmallows were stirred through. With the addition of the marshmallows, the batter became slightly thicker, probably due to the presence of cornflour on the marshmallows.

When baked, most of the marshmallows had kept their shape but some had melted and spread their white gooeyness over the surface of the brownie.

Wait for the brownie to cool down to room temperature, then use a hot knife to slice the brownie into bars. It tastes divine - gooey, light and like pizza cheese, stringy. Sublime!


Marshmallow chocolate brownies

Ingredients
120 gm flour
50 gm cocoa
A pinch of salt
200 gm butter
100 gm cooking chocolate, chopped
400 gm sugar
4 eggs
1 tsp vanilla extract
120 gm mini marshmallows

Method
Sift flour, cocoa and salt into a bowl, keep aside.
Melt the butter over a water bath, stir in chocolate pieces, stir till chocolate is melted.
Place sugar in a mixing bowl, break eggs into it and whisk along with the vanilla extract.
When foamy, stir in the butter and chocolate paste and stir gently to combine.
Fold in the flour and cocoa mix, add the marshmallows.
Turn the mixture into a 9"x 13" baking pan that has been lined with grease proof paper.
Bake at 180°C for about 20 minutes.
The centre of the brownie should be just firm.
Take out of the oven and leave to cool completely in the pan.
Use a sharp knife and slice into 32 pieces.

Marshmallow chocolate brownies

Fish sambal with coconut milk rice

0 comments


One of my favorite foods in Singapore is nasi lemak. Many food stalls sell it in banana leaves wrapped into a cone shape. Cut open the raffia tie and the aroma of coconut and pandan escapes. Inside, you will find a mound of fragrant rice, slices of cucumber, fried anchovies and peanuts, a thick and spicy sambal (sauce) and half a boiled egg. The stall near my home includes a crisp fried fish as well.

Coconut milk rice is pretty simple to make, though for an authentic taste, you need to use pandan leaves. Coconut milk adds richness to the rice, I prefer to use thin coconut milk.

Coconut rice

Ingredients
450 gm basmati rice
4 cloves garlic, peeled
1" piece ginger, peeled
4-5 pandan leaves
200 ml thick coconut milk
Water
Salt to taste

Method
Wash and soak the rice for about 30 minutes.
In the meantime, julienne the garlic and ginger.
Wash the pandan leaves under running water then run a fork through them.
Tie the shredded leaves into a bundle.
Drain off the water from the rice and put it into the rice cooker along with the pandan leaves, garlic and ginger strips.
Mix coconut milk and enough water to make a litre of liquid.
Pour it over the rice. Add salt to taste, stir well and switch on the cooker.
(You can add more of the thick coconut milk and less water if you prefer a richer taste.)

This is what the rice looks like at the start of cooking


 After 25 minutes, the cooking process is well underway

 A pot of hot and fragrant coconut milk rice   

After the rice is cooked, allow it to sit undisturbed for about 15 minutes. Fluff up the rice, discard the pandan leaves and plate up.

I served this with fish sambal. This is the same recipe as the prawn sambal, except that I made it with 750 grams of king fish fillets instead of prawns. Marinate the fish with 1/2 teaspoon chilli powder, 1/4 teaspoon turmeric powder and 1/4 teaspoon salt for about half an hour. Shallow fry the slices in 1/4 cup of oil, drain them well and then carry on with the rest of the recipe.


On a Roll

0 comments


I had another order for the strawberry and white chocolate gateau, this time for a pair of twins who were celebrating their 10th birthday. And instead of strawberries to decorate the top with, I dipped fresh cherries into melted chocolate for a different look.

Swiss rolls slices to line the gateau

There are some 6 layers to this gateau. Slices of Swiss roll, also known as jelly roll, are arranged along the outer edge of the gateau.

Swiss rolls are easy to make but a challenge to a lot of folks, mainly because they have a tendency to crack whilst being rolled up. As with most sponge cakes, this roll needs only a few ingredients and no oil or butter in the batter.

Swiss roll with strawberry jam

Here's the recipe for a supple Swiss roll.

Ingredients
115 gm plain flour 
115 gm sugar
4 eggs
1 tsp vanilla essence
2 tbsp boiling water
Strawberry jam for filling
A 10" x11" Swiss roll pan (you can use a 9"x13" also), lined with greaseproof paper

Method
Sift  the flour three times.
Place sugar and break the eggs into a mixing bowl.
Also add in the vanilla essence.
Use an electric beater and beat till very thick and fluffy.
Fold in the boiling water, then fold in the flour in three lots. Fold in gently so as not to knock out the air.
Use a spatula to scrape the batter into the prepared tin.
Spread the batter into the edges of the pan and level the surface. 
Drop the pan onto the counter top to knock out the larger air bubbles, place in a preheated 190°C oven for about 13-15 minutes.
While the roll is baking, cut a sheet of greaseproof paper that is a little larger that the baking pan. 
Dampen a kitchen towel, then place the greaseproof paper over it and sprinkle some sugar over.
When the cake is done, it should be firm to the touch and would have shrunk a little from the sides.
Take the pan out of the oven and turn it over onto the sugared paper, peel off the lining paper and discard.
Quickly spread a thin layer of jam over the top, then with the longer side facing you, roll up tightly, using the paper to guide you. (Don't roll the paper along with the sponge!)


Roll the sponge in the kitchen towel and keep aside for about 30 minutes. 
When the roll is cool, remove the wrappings, sprinkle sugar or icing sugar over the roll.
Use a sharp knife and a sawing motion to slice. 
And why was sugar sprinkled on the sheet of greaseproof paper? It was to prevent the surface of the roll from sticking to the paper.


Cupcakes!

0 comments

What is it about cupcakes that evokes so much of interest? The size? The flavour? The colours?
Cupcakes have been around for ages, longtime bakers would have had a couple of orders  for cupcakes coming in over the years.


These are the cupcakes I made yesterday.


All of them chocolate with buttercream frosting.

July birthdays

0 comments


Difficult to believe that half the year is over. Another six months and then it's Christmas!
This chocolate ganache cake is dedicated to all those born in the month of July. Happy birthday to you all.


Lamb lasagna


Tonight's dinner was lamb lasagna. I prefer buying pasta sheets, the home made ones tend to overcook and result in a pasty mess. The no cook lasagna sheets make this dish such a breeze.


I lifted the topmost layer a little to let the filling peek out . And I guess you can see my little secret- I ran out of mozzarella cheese and had to use processed cheese. Of course, this cheese doesn't melt. Oh well! Tasted fantastic, anyway.
One of these days, I shall post the recipe. And make another lasagna, this time with the right cheese.

 
  • Bake Tales © 2012